Miscellany2
Contents
- 1 Miscellany 2
- 1.1 Stages of crater formation
- 1.2 Fission Theory
- 1.3 Crescent Venus
- 1.4 LROC Targets
- 1.5 Light on Ptolemaeus
- 1.6 Domes & Structure
- 1.7 Poles
- 1.8 Northern Arc
- 1.9 Messy-er?
- 1.10 Sill, dyke, laccolith
- 1.11 SPA Chunk
- 1.12 Orientale
- 1.13 Humboltianum
- 1.14 Kaguya Crash
- 1.15 Compton Peak
- 1.16 Funny shapes
Miscellany 2
This page follows along the same aims in that of the original Miscellany page -- that is, to include occasional images from LPOD that have been annotated to aid in discussion. If you would like to add an image relevant to an LPOD, then please see directions at end of this page for help (it's so simple). Visit also the third part of the Miscellany pages: Miscellany 3
Stages of crater formation
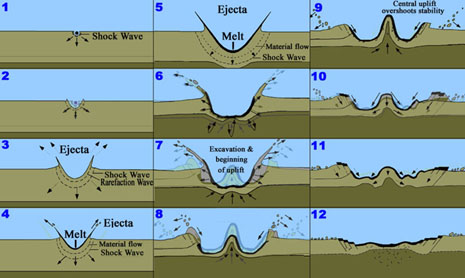
The image below shows stages of a Peak-Crater forming as an impactor strikes its target rock. The image was made from ananimation produced by the Department of Planetary Sciences Lunar & Planetary Laboratory at the University of Arizona, Tuscon, USA. Note, this is an animation of an impactor striking the Earth at Chicxulub in Mexico, however, its formation would bear similarities to that of an impactor striking the Moon.
Fission Theory
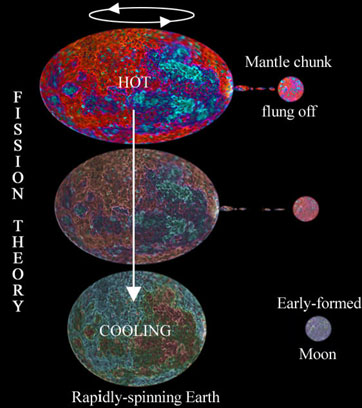
The image below shows how a rapidly-spinning Earth may have been responsible for creation of the Moon. As the Earth spun, mantle material on its surface was flung off into space, and this later cooled into the Moon we see today. The 'Fission Theory', however, is not considered a serious contender for creation of the Moon, as the rotational dynamics involved for such an event to occur is unlikely.

  Image courtesy of - JohnMoore2
Crescent Venus
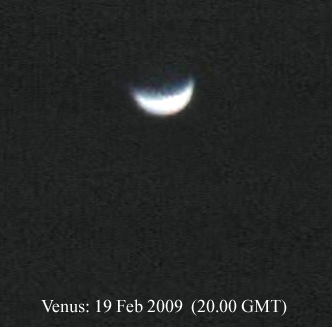
It's always a pleasure to take a picture of a crescent Moon, however, this crescent Venus image below was a change. In Reference to LPOD 1 March 2009 images.

  Image courtesy of - JohnMoore2
LROC Targets
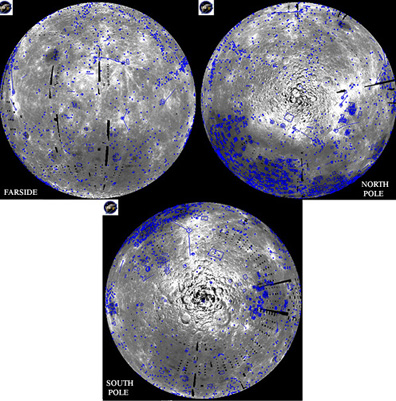
Blue boxes = targets selected so far, black strips = data gaps in Clementine mosaic. In reference to LPOD -- 10 March 2009

  Images credit: LROC team, Arizona State University, USA.
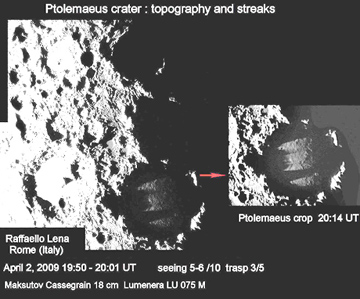
Light on Ptolemaeus
The original image below by Raffaello Leno from 5 April 2009 was slightly manipulated to "see the light".
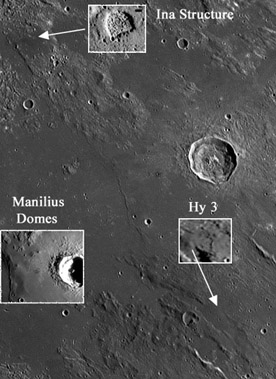
Domes & Structure
Image below is in reference to LPOD April 16 2009 -- showing some difficult features observed.

  Image Credit: Yuri Goryachko, Mikhail Abgarian, Konstantin Morozov
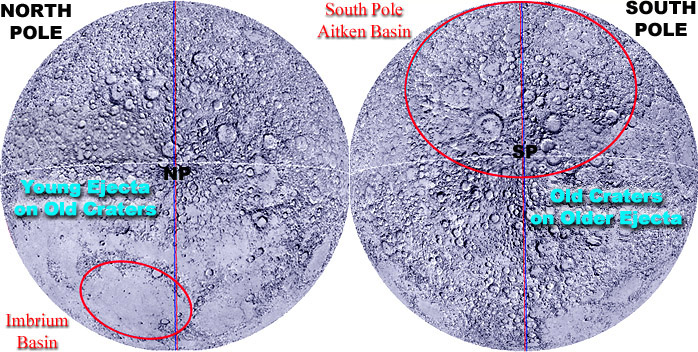
Poles
The image below may serve as a quick but simple identification of the ejecta/crater relationships at both pole regions on the Moon. In reference to LPOD May 11 2009. For more on Impact Basin locations on all of the Moon, see List of Basins in the Moon Wiki.
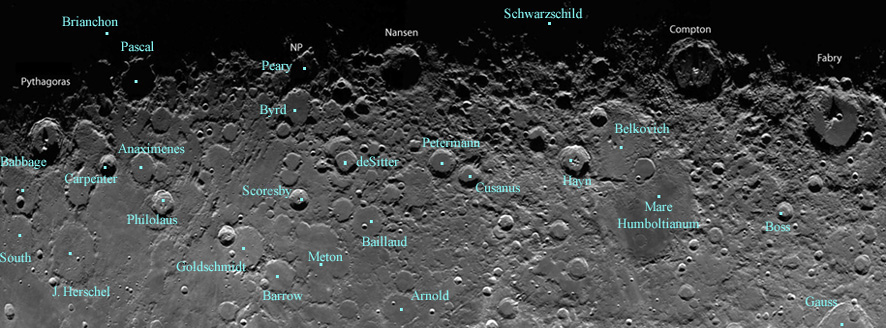
Northern Arc
Image below may serve as an aid for identification of crater names in reference to 13 May 2009 LPOD.

  Image Credit: Ciclops
Messy-er?
Image below on the May 15 2009 LPOD was stretched and sharpened just to see if more detail might show up. Does it?

  Image Credit: NASA Public Affairs Office
Sill, dyke, laccolith
Descriptive image below of terms used in reference to LPOD 20 May 2009

  Image Credit: John Moore
SPA Chunk
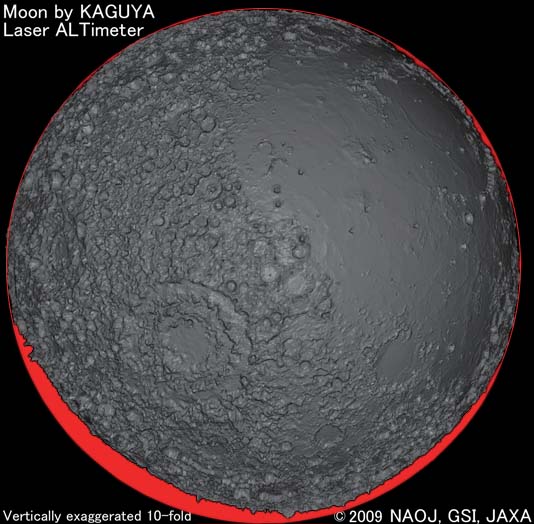
Image below gives an idea to the extent that the SPA impact had in the region around that basin (SPA is just about coming into view at bottom left). A perfect, proportionate circle was roughly drawn around the edge of the Moon, and the red areas represent missing portions of the circle, which also represent portions of missing moon material. This image is just one frame taken from an animation produced from data from the Kaguya Laser ALTimeter (vertical exaggeration is 10-fold). Some additional frames (without the red background) can be seen here. In reference to May 29 LPOD.

  Image Credit: NAOJ GSI JAXA
Orientale
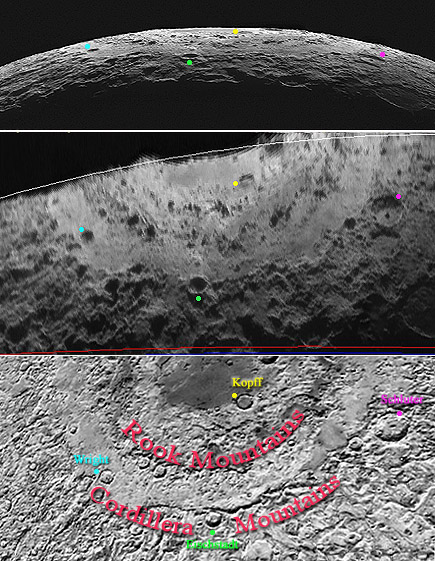
Image below shows different aspect views of the Orientale Basin as appeared in 30 May 2009 LPOD. Top = Original photo, Mid = Same original photo but this time given an 'Aerial View' treatment using LTVT, Bot = VMA. The coloured dots represent craters in the region and were inserted as reference points (Blue - Wright, Green - Eischstadt, Yellow - Kopff, Pink - Schluter).

  Image Credit: Yuri Goryachko, Mikhail Abgarian, Konstantin Morozov, Minsk, Belarus.
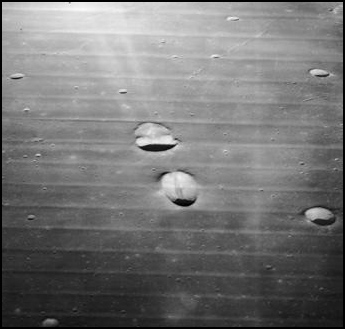
Humboltianum
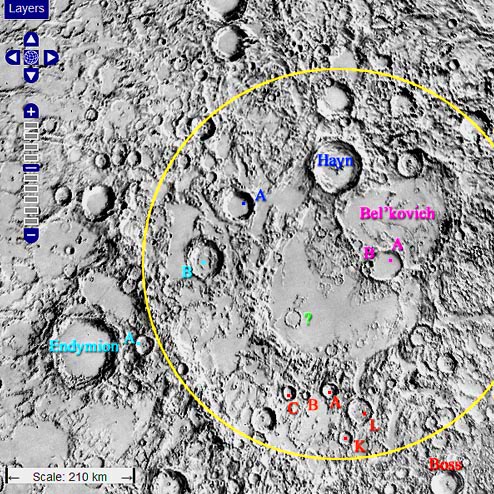
Annotated image below using the Apollo WMS Image Map may aid in identification in some of the craters mentioned in LPOD 3 June 2009.
Kaguya Crash
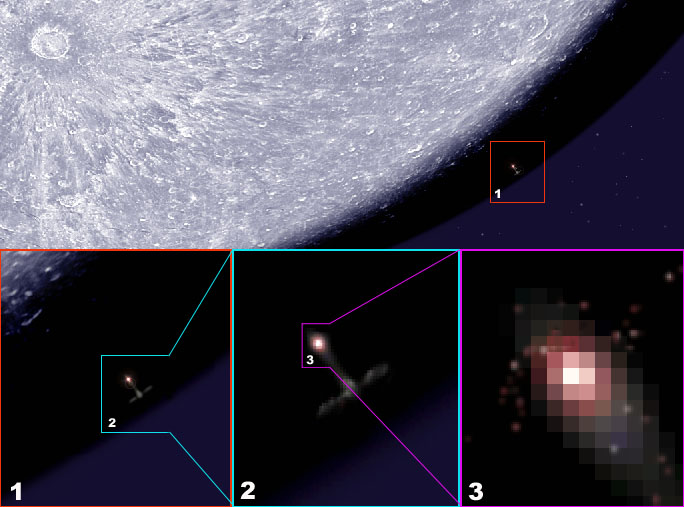
Is this how Kaguya will appear as it crashes onto the surface of the Moon? (1) and (2) -- flash time and signs of a plume, (3) -- hot, hot ejecta. In reference to LPOD 9 June 2009

 Image Credit - JohnMoore2
Compton Peak
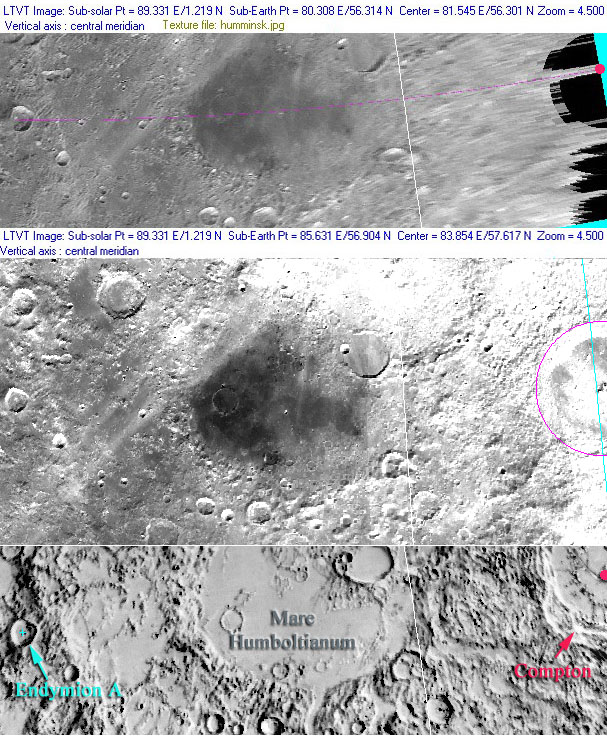
Annotated image below shows confirmational aspects of the mountain peak in relation to LPOD 11 June 2009. Top, shows an LTVT aerial view of the original image by Yuri Goryachko, Mikhail Abgarian, Konstantin Morozov. Middle, shows also another LTVT aerial view of the same region using a Clementine image. Bottom, shows the same region in a shaded relief map (all three images approximately have the same LTVT aerial view, scale and zoom properties). The red dot in the top and bottom image represents the mountain peak, the pink line in the top image was initallly used as a reference line to ensure exact peak location, and the blue aqua line in the middle image represents features close on the moon's limb at time of photograph taken (note, how Compton's peaks just lie close to this limb line). Reference to the three images together should be seen in the light of discussions that arised out of the original LPOD.
Funny shapes
In reference to July 17 LPOD discussion.
Image credit: John Moore
ADDING TEXT & IMAGE TO THIS PAGE
Just like as in the WikiMoon pages all you have to do is:
(1)Click on 'Edit This Page' above,
(2)Place the cursor on the page on where you want the image to appear,
(3)Click the green icon (just left of the blue-looking TV icon) on the top, and click on 'Upload Files' and 'Browse',
(4)Find the image in your own file system on your own computer, and open it,
(5)Clicking on 'Upload' will install a small version of your image, and to insert it all you have to do is do a 'double-click' on it -- you're done....the image appears in the main page!
(6) Add some text, and to finish, just click 'Save'.
If you need to re-edit it later, just go to 'Edit This Page' again. You can experiment around as much as you like, until you're satisfied with the final version. Don't worry, you won't be criticised for your effort or anything like that, but your contribution will certainly be appreciated.
